/*-----------------------------------------------------------.
/ Description /
'------------------------------------------------------------/
Game:
Preset:
SweetFX: v2.0 Preview 8 by CeeJay.dk
API hook: Reshade by Crosire
This is a preview release meant to allow users to beta test SweetFXs 2.0 new injector called ReShade.
More features, bugfixes and performance optimizations will come before release.
Hope you enjoy SweetFX and ReShade.
- CeeJay.dk
+++++++++++++++++++++WARFRAME+++++++++++++++++++++++
-Scroll lock - Enable / Disable Effects
-In game AA MUST be disabled
/*-----------------------------------------------------------.
/ Choose effects /
'-----------------------------------------------------------*/
// Effects are listed in the order that they are applied.
// Set to 1 for ON or 0 for OFF
#define USE_ASCII 0 //[0 or 1] Ascii : Converts the image to Ascii-art.
#define USE_CARTOON 0 //[0 or 1] Cartoon : "Toon"s the image.
#define USE_SMAA 1 //[0 or 1] SMAA Anti-aliasing : Smoothens jagged lines using the SMAA technique.
#define USE_FXAA 0 //[0 or 1] FXAA Anti-aliasing : Smoothens jagged lines using the FXAA technique.
#define USE_EXPLOSION 0 //[0 or 1] Explosion : Scatters the pixels, making the image look fuzzy.
#define USE_CA 0 //[0 or 1] Chromatic Aberration : Mimics the look of a cheap camera lens, by distorting the colors.
#define USE_ADVANCED_CRT 0 //[0 or 1] Advanced CRT : Simulates an old CRT TV display. (has a very high performance cost)
#define USE_PIXELART_CRT 0 //[0 or 1] PixelArt CRT : Scanlines for pixel art (high performance cost)
#define USE_BLOOM 0 //[0 or 1] Bloom : Makes bright lights bleed their light into their surroundings (relatively high performance cost)
#define USE_HDR 0 //[0 or 1] HDR : Not actual HDR - It just tries to mimic an HDR look (relatively high performance cost)
#define USE_LUMASHARPEN 1 //[0 or 1] LumaSharpen : Sharpens the image.
#define USE_LENS_DISTORTION 0 //[0 or 1] Cubic Lens Distortion : Distorts the lens cubicly. (WIP)
#define USE_NOSTALGIA 0 //[0 or 1] Nostalgia : Remember when you played that game you always played on that first system of yours? You don't? Well here is a reminder.
#define USE_LEVELS 0 //[0 or 1] Levels : Sets a new black and white point. This increases contrast but causes clipping. Use Curves instead if you want to avoid that.
#define USE_TECHNICOLOR 0 //[0 or 1] TECHNICOLOR : Attempts to mimic the look of an old movie using the Technicolor three-strip color process (Techicolor Process 4)
#define USE_TECHNICOLOR2 0 //[0 or 1] TECHNICOLOR 2 : Yet another Technicolor effect - not sure if this stays or not. Let me know if you like it.
#define USE_DPX 0 //[0 or 1] Cineon DPX : Should make the image look like it's been converted to DXP Cineon - basically it's another movie-like look similar to technicolor.
#define USE_MONOCHROME 0 //[0 or 1] Monochrome : Monochrome makes the colors disappear.
#define USE_COLORMATRIX 0 //[0 or 1] Color Matrix : Allows color modification using a user-defined color matrix.
#define USE_LIFTGAMMAGAIN 1 //[0 or 1] Lift Gamma Gain : Adjust brightness and color of shadows, midtones and highlights.
#define USE_TONEMAP 1 //[0 or 1] Tonemap : Adjust gamma, exposure, saturation, bleach and defog. (may cause clipping)
#define USE_VIBRANCE 0 //[0 or 1] Vibrance : Intelligently saturates (or desaturates if you use negative values) the pixels depending on their original saturation.
#define USE_CURVES 1 //[0 or 1] Curves : Contrast adjustments using S-curves.
#define USE_SEPIA 0 //[0 or 1] Sepia : Sepia tones the image.
#define USE_VIGNETTE 0 //[0 or 1] Vignette : Darkens the edges of the image to make it look more like it was shot with a camera lens. May cause banding artifacts.
#define USE_FILMGRAIN 0 //[0 or 1] Film Grain : Adds film grain to the image.
#define USE_DITHER 0 //[0 or 1] Dither : Applies dithering to simulate more colors than your monitor can display. This lessens banding artifacts (mostly caused by Vignette)
#define USE_BORDER 0 //[0 or 1] Border : Can be used to create letterbox borders around the image.
#define USE_SPLITSCREEN 0 //[0 or 1] Splitscreen : Enables the before-and-after splitscreen comparison mode. (Only partially working right now)
#define USE_TRANSITION 0 //[0 or 1] Transition : Shows a welcome screen and then transitions to the regularly scheduled programming
#define USE_DEPTH 0 //[0 or 1] Depth : Enables the possibility to display the depth buffer - You will still need to toogle it on/off with (*) in-game
#define USE_CUSTOM 0 //[0 or 1] Custom : Write your own shader by editing custom.h, and then enable it here.
/*-----------------------------------------------------------.
/ Ascii settings /
'-----------------------------------------------------------*/
#define Ascii_input_image 1 //[1 or 2] 1 = Color buffer, 2 = Depth buffer.
#define Ascii_spacing 1 //[0 to 9] Determines the spacing between characters. I feel 1 to 3 looks best.
#define Ascii_font 2 //[1 or 2] 1 = 5x5 font, 2 = 3x5 font
#define Ascii_font_color float3(255, 255, 255) //[0 to 255, 0 to 255, 0 to 255] What color the font should be. In integer RGB colors.
#define Ascii_background_color float3(0, 0, 0) //[0 to 255, 0 to 255, 0 to 255] What color the background should be. In integer RGB colors.
#define Ascii_swap_colors 0 //Swaps the font and background color when you are too lazy to edit the settings above (I know I am)
#define Ascii_invert_brightness 0 //[0 or 1]
#define Ascii_font_color_mode 1 //[0 to 2] 0 = font_color, 1 = image color, 2 = colorized grayscale
/*-----------------------------------------------------------.
/ SMAA Anti-aliasing settings /
'-----------------------------------------------------------*/
#define SMAA_THRESHOLD 0.05 //[0.05 to 0.20] Edge detection threshold. If SMAA misses some edges try lowering this slightly. I prefer between 0.08 and 0.12.
#define SMAA_DEPTH_THRESHOLD 0.001 //[0.001 to 0.100] Depth edge detection threshold. Same as above but for the depth edge detection. This can go insanely low and still look good.
#define SMAA_MAX_SEARCH_STEPS 98 //[0 to 98] Determines the radius SMAA will search for aliased edges
#define SMAA_MAX_SEARCH_STEPS_DIAG 16 //[0 to 16] Determines the radius SMAA will search for diagonal aliased edges
#define SMAA_CORNER_ROUNDING 0 //[0 to 100] Determines the percent of antialiasing to apply to corners. 0 seems to affect fine text the least so it's the default.
// -- Advanced SMAA settings --
#define SMAA_EDGE_DETECTION 2 //[1|2|3] 1 = Luma edge detection, 2 = Color edge detection, 3 = Depth edge detection
#define SMAA_DIRECTX9_LINEAR_BLEND 0 //[0 or 1] Using DX9 HARDWARE? (software version doesn't matter) if so this needs to be 1 - If not, leave it at 0.
//Enable this only if you use a Geforce 7xxx series or older card, or a Radeon X1xxx series or older card.
// -- SMAA Predication settings --
#define SMAA_PREDICATION 0 //[0 or 1] Enables predication which uses BOTH the color and the depth texture for edge detection to more accurately detect edges.
#define SMAA_PREDICATION_THRESHOLD 0.001 // Threshold to be used in the depth buffer.
#define SMAA_PREDICATION_SCALE 2.0 // How much to scale the global threshold used for luma or color edge detection when using predication
#define SMAA_PREDICATION_STRENGTH 0.4 // How much to locally decrease the threshold.
// -- Debug SMAA settings --
#define SMAA_DEBUG_OUTPUT 0 //[0 to 4] 0 = Normal, 1 = edgesTex, 2 = blendTex, 3 = areaTex, 4 = searchTex - Only for troubleshooting. Users don't need to mess with this.
/*-----------------------------------------------------------.
/ FXAA Anti-aliasing settings /
'-----------------------------------------------------------*/
#define FXAA_QUALITY__PRESET 9 //[1 to 9] Choose the quality preset. 9 is the highest quality.
#define fxaa_Subpix 0.000 //[0.000 to 1.000] Choose the amount of sub-pixel aliasing removal. Higher values makes the image softer/blurrier.
#define fxaa_EdgeThreshold 0.166 //[0.000 to 1.000] Edge detection threshold. The minimum amount of local contrast required to apply algorithm. Similar to SMAA_THRESHOLD
#define fxaa_EdgeThresholdMin 0.000 //[0.000 to 1.000] Darkness threshold. Pixels darker than this are not processed in order to increase performance.
/*-----------------------------------------------------------.
/ Explosion settings /
'-----------------------------------------------------------*/
#define Explosion_Radius 2.0 //[0.2 to 100.0] Amount of effect you want.
/*-----------------------------------------------------------.
/ Chromatic Aberration settings /
'-----------------------------------------------------------*/
#define Chromatic_shift float2(2.5,-0.5) //[-100.0 to 100.0, -100.00 to 100.0] Distance (X,Y) in pixels to shift the color components.
//For a slightly blurred look try fractional values (.5) between two pixels.
#define Chromatic_strength 1.0 //Adjust the strength of the effect.
/*-----------------------------------------------------------.
/ Cartoon settings /
'-----------------------------------------------------------*/
#define CartoonPower 1.5 //[0.1 to 10.0] Amount of effect you want.
#define CartoonEdgeSlope 1.5 //[0.1 to 8.0] Raise this to filter out fainter edges. You might need to increase the power to compensate. Whole numbers are faster.
/*----------------------------------------------------------.
/ Advanced CRT settings /
'----------------------------------------------------------*/
#define CRTAmount 1.00 //[0.00 to 1.00] Amount of CRT effect you want
#define CRTResolution 2.0 //[1.0 to 8.0] Input size coefficent (low values gives the "low-res retro look"). Default is 1.2
#define CRTgamma 2.2 //[0.0 to 4.0] Gamma of simulated CRT (default 2.2)
#define CRTmonitorgamma 2.4 //[0.0 to 4.0] Gamma of display monitor (typically 2.2 is correct)
#define CRTBrightness 1.2 //[1.0 to 3.0] Used to boost brightness a little. Default is 1.0
#define CRTScanlineIntensity 2.0 //[2.0 to 4.0] Scanlines intensity (use integer values preferably). Default is 2.0
#define CRTScanlineGaussian 1 //[0 or 1] Use the "new nongaussian scanlines bloom effect". Default is on
#define CRTCurvature 1 //[[0 or 1] "Barrel effect" enabled (1) or off (0)
#define CRTCurvatureRadius 2.0 //[0.0 to 2.0] Curvature Radius (only effective when Curvature is enabled). Default is 1.5
#define CRTCornerSize 0.0100 //[0.0000 to 0.0020] Higher values, more rounded corner. Default is 0.001
#define CRTDistance 2.00 //[0.00 to 4.00] Simulated distance from viewer to monitor. Default is 2.00
#define CRTAngleX 0.00 //[-0.20 to 0.20] Tilt angle in radians (X coordinates)
#define CRTAngleY -0.15 //[-0.20 to 0.20] Tilt angle in radians (Y coordinates). (Value of -0.15 gives the 'arcade tilt' look)
#define CRTOverScan 1.00 //[1.00 to 1.10] Overscan (e.g. 1.02 for 2% overscan). Default is 1.01
#define CRTOversample 0 //[0 or 1] Enable 3x oversampling of the beam profile (warning : performance hit)
/*-----------------------------------------------------------.
/ Pixel Art CRT /
'-----------------------------------------------------------*/
// -- Emulated input resolution --
#define PixelArtCRT_resolution_mode 1 //[1 or 2] 1 = Ratio, 2 = Fixed resolution
#define PixelArtCRT_resolution_ratio (1.0/4.0) //
#define PixelArtCRT_fixed_resolution float2(320.0,160.0) //
// -- Hardness --
#define PixelArtCRT_hardScan -24.0 // Hardness of scanline : -8.0 = soft, -16.0 = medium
#define PixelArtCRT_hardPix -24.0 // Hardness of pixels in scanline : -2.0 = soft, -4.0 = hard
// -- Display warp --
#define PixelArtCRT_warp float2(1.0/64.0,1.0/24.0) // Display warp : 0.0 = none , 1.0/8.0 = extreme
// -- Type of shadow mask --
#define PixelArtCRT_ShadowMask 3 // Type of shadow mask : 1 = Very compressed TV style shadow mask, 2 = Aperture-grille, 3 = Stretched VGA style shadow mask, 4 = VGA style shadow mask
// -- Amount of shadow mask --
#define PixelArtCRT_maskDark 0.5 //
#define PixelArtCRT_maskLight 1.5 //
// -- Falloff shape --
#define PixelArtCRT_shape 3.0 // Falloff shape : 1.0 = exp(x), 1.25 = in between, 2.0 = gaussian, 3.0 = more square
// -- Amp signal --
#define PixelArtCRT_overdrive 1.25 //
/*-----------------------------------------------------------.
/ Bloom settings /
'-----------------------------------------------------------*/
#define BloomThreshold 20.25 //[0.00 to 50.00] Threshold for what is a bright light (that causes bloom) and what isn't.
#define BloomPower 1.446 //[0.000 to 8.000] Strength of the bloom
#define BloomWidth 0.0142 //[0.0000 to 1.0000] Width of the bloom
/*-----------------------------------------------------------.
/ HDR settings /
'-----------------------------------------------------------*/
#define HDRPower 1.30 //[0.00 to 8.00] Strangely lowering this makes the image brighter
#define radius2 0.87 //[0.00 to 8.00] Raising this seems to make the effect stronger and also brighter
/*-----------------------------------------------------------.
/ LumaSharpen settings /
'-----------------------------------------------------------*/
// -- Sharpening --
#define sharp_strength 1.02 //[0.10 to 3.00] Strength of the sharpening
#define sharp_clamp 0.045 //[0.000 to 1.000] Limits maximum amount of sharpening a pixel recieves - Default is 0.035
// -- Advanced sharpening settings --
#define pattern 3 //[1|2|3|4] Choose a sample pattern. 1 = Fast, 2 = Normal, 3 = Wider, 4 = Pyramid shaped.
#define offset_bias 1.0 //[0.0 to 6.0] Offset bias adjusts the radius of the sampling pattern.
//I designed the pattern for offset_bias 1.0, but feel free to experiment.
// -- Debug sharpening settings --
#define show_sharpen 0 //[0 or 1] Visualize the strength of the sharpen (multiplied by 4 to see it better)
/*----------------------------------------------------------.
/ Notalgia settings /
'----------------------------------------------------------*/
//Nothing here yet, but you will get to set the palette to use and toggle dithering, and maybe pixelate the image .. once the effect is done.
//For now it just displays the image with a C64 palette
/*----------------------------------------------------------.
/ Levels settings /
'----------------------------------------------------------*/
#define Levels_black_point 16 //[0 to 255] The black point is the new black - literally. Everything darker than this will become completely black. Default is 16.0
#define Levels_white_point 235 //[0 to 255] The new white point. Everything brighter than this becomes completely white. Default is 235.0
//Colors between the two points will stretched, which increases contrast, but details above and below the points are lost (this is called clipping).
// -- Debug settings --
#define Levels_highlight_clipping 0 //[0 or 1] Highlight the pixels that clip. Red = Some detail is lost in the highlights, Yellow = All detail is lost in the highlights,
// Blue = Some detail is lost in the shadows, Cyan = All detail is lost in the shadows.
/*-----------------------------------------------------------.
/ TECHNICOLOR settings /
'-----------------------------------------------------------*/
#define TechniAmount 0.40 //[0.00 to 1.00]
#define TechniPower 4.00 //[0.00 to 8.00]
#define redNegativeAmount 0.88 //[0.00 to 1.00]
#define greenNegativeAmount 0.88 //[0.00 to 1.00]
#define blueNegativeAmount 0.88 //[0.00 to 1.00]
/*-----------------------------------------------------------.
/ TECHNICOLOR 2 settings /
'-----------------------------------------------------------*/
#define Technicolor2_Red_Strength 0.2 //[0.05 to 1.0] Color Strength of Red channel. Higher means darker and more intense colors.
#define Technicolor2_Green_Strength 0.2 //[0.05 to 1.0] Color Strength of Green channel. Higher means darker and more intense colors.
#define Technicolor2_Blue_Strength 0.2 //[0.05 to 1.0] Color Strength of Blue channel. Higher means darker and more intense colors.
#define Technicolor2_Brightness 1.0 //[0.5 to 1.5] Brightness Adjustment, higher means brighter image.
#define Technicolor2_Strength 1.0 //[0.0 to 1.0] Strength of Technicolor effect. 0.0 means original image.
#define Technicolor2_Saturation 0.7 //[0.0 to 1.5] Additional saturation control since technicolor tends to oversaturate the image.
/*-----------------------------------------------------------.
/ Cineon DPX settings /
'-----------------------------------------------------------*/
#define Red 8.0 //[1.0 to 15.0]
#define Green 8.0 //[1.0 to 15.0]
#define Blue 8.0 //[1.0 to 15.0]
#define ColorGamma 2.5 //[0.1 to 2.5] Adjusts the colorfulness of the effect in a manner similar to Vibrance. 1.0 is neutral.
#define DPXSaturation 3.0 //[0.0 to 8.0] Adjust saturation of the effect. 1.0 is neutral.
#define RedC 0.36 //[0.60 to 0.20]
#define GreenC 0.36 //[0.60 to 0.20]
#define BlueC 0.34 //[0.60 to 0.20]
#define Blend 0.2 //[0.00 to 1.00] How strong the effect should be.
/*------------------------------------------------------------.
/ Monochrome settings /
'------------------------------------------------------------*/
#define Monochrome_conversion_values float3(0.21, 0.72, 0.07) //[0.00 to 1.00] Percentage of RGB to include (should sum up to 1.00)
#define Monochrome_color_saturation 0.00 //[0.00 to 2.00] Percentage of saturation to keep. Default is 0.00 , values above 1.00 boost saturation above normal.
/*-----------------------------------------------------------.
/ Color Matrix settings /
'-----------------------------------------------------------*/
// Red Green Blue
#define ColorMatrix_Red float3(0.817, 0.183, 0.000) //[0.00 to 1.00] How much of Red, Green and Blue the new red value should contain - Should sum to 1.000 if you don't wish to change the brightness
#define ColorMatrix_Green float3(0.333, 0.667, 0.000) //[0.00 to 1.00] How much of Red, Green and Blue the new green value should contain - Should sum to 1.000 if you don't wish to change the brightness
#define ColorMatrix_Blue float3(0.000, 0.125, 0.875) //[0.00 to 1.00] How much of Red, Green and Blue the new blue value should contain - Should sum to 1.000 if you don't wish to change the brightness
#define ColorMatrix_strength 1.0 //Adjust the strength
/*-----------------------------------------------------------.
/ Lift Gamma Gain settings /
'-----------------------------------------------------------*/
#define RGB_Lift float3(0.970, 0.950, 0.970) //[0.000 to 2.000] Adjust shadows for Red, Green and Blue.
#define RGB_Gamma float3(1.000, 1.000, 1.000) //[0.000 to 2.000] Adjust midtones for Red, Green and Blue
#define RGB_Gain float3(1.000, 1.000, 1.000) //[0.000 to 2.000] Adjust highlights for Red, Green and Blue
//Note that a value of 1.000 is a neutral setting that leave the color unchanged.
/*-----------------------------------------------------------.
/ Tonemap settings /
'-----------------------------------------------------------*/
#define Gamma 1.000 //[0.000 to 2.000] Adjust midtones. 1.000 is neutral. This setting does exactly the same as the one in Lift Gamma Gain, only with less control.
#define Exposure 0.000 //[-1.000 to 1.000] Adjust exposure
#define Saturation 0.000 //[-1.000 to 1.000] Adjust saturation
#define Bleach 0.000 //[0.000 to 1.000] Brightens the shadows and fades the colors
#define Defog 0.008 //[0.000 to 1.000] How much of the color tint to remove
#define FogColor float3(0.00, 0.00, 1.00) //[0.00 to 2.55, 0.00 to 2.55, 0.00 to 2.55] What color to remove - default is blue
/*-----------------------------------------------------------.
/ Vibrance settings /
'-----------------------------------------------------------*/
#define Vibrance 0.15 //[-1.00 to 1.00] Intelligently saturates (or desaturates if you use negative values) the pixels depending on their original saturation.
#define Vibrance_RGB_balance float3(1.00, 1.00, 1.00) //[-10.00 to 10.00,-10.00 to 10.00,-10.00 to 10.00] A per channel multiplier to the Vibrance strength so you can give more boost to certain colors over others
/*-----------------------------------------------------------.
/ Curves settings /
'-----------------------------------------------------------*/
#define Curves_mode 0 //[0|1|2] Choose what to apply contrast to. 0 = Luma, 1 = Chroma, 2 = both Luma and Chroma. Default is 0 (Luma)
#define Curves_contrast 0.21 //[-1.00 to 1.00] The amount of contrast you want
// -- Advanced curve settings --
#define Curves_formula 4 //[1|2|3|4|5|6|7|8|9|10|11] The contrast s-curve you want to use.
//1 = Sine, 2 = Abs split, 3 = Smoothstep, 4 = Exp formula, 5 = Simplified Catmull-Rom (0,0,1,1), 6 = Perlins Smootherstep
//7 = Abs add, 8 = Techicolor Cinestyle, 9 = Parabola, 10 = Half-circles. 11 = Polynomial split.
//Note that Technicolor Cinestyle is practically identical to Sine, but runs slower. In fact I think the difference might only be due to rounding errors.
//I prefer 2 myself, but 3 is a nice alternative with a little more effect (but harsher on the highlight and shadows) and it's the fastest formula.
/*-----------------------------------------------------------.
/ Sepia settings /
'-----------------------------------------------------------*/
#define ColorTone float3(1.40, 1.10, 0.90) //[0.00 to 2.55, 0.00 to 2.55, 0.00 to 2.55] What color to tint the image
#define GreyPower 0.11 //[0.00 to 1.00] How much desaturate the image before tinting it
#define SepiaPower 0.58 //[0.00 to 1.00] How much to tint the image
/*-----------------------------------------------------------.
/ Daltonize settings /
'-----------------------------------------------------------*/
#define Daltonize_type 1 //[1|2|3] Type of colorblindness. 1 = Protanopia (missing red spectrum), 2 = Deuteranopia (missing green spectrum), 3 = Tritanopia (missing blue spectrum)
/*-----------------------------------------------------------.
/ Film Grain settings /
'-----------------------------------------------------------*/
#define FilmGrain_intensity 0.50 //[0.00 to 1.00] How visible the grain is. Higher is more visible.
#define FilmGrain_variance 0.40 //[0.00 to 1.00] Controls the variance of the gaussian noise. Lower values look smoother.
#define FilmGrain_SNR 6 //[0 to 16] Higher Signal-to-Noise Ratio values give less grain to brighter pixels. 0 disables this feature.
// -- Advanced Film Grain settings --
#define FilmGrain_mean 0.50 //[0.00 to 1.00] The average mean of the gaussian noise. Probably best kept at the middle value (0.50)
//A sideeffect of the Film Grain effect is that it also dithers the screen.
//You don't need both the Film Grain and the Dither effect enabled at the same time.
/*-----------------------------------------------------------.
/ Vignette settings /
'-----------------------------------------------------------*/
#define VignetteType 1 //[1|2|3] 1 = Original, 2 = New, 3 = TV style
#define VignetteRatio 1.00 //[0.15 to 6.00] Sets a width to height ratio. 1.00 (1/1) is perfectly round, while 1.60 (16/10) is 60 % wider than it's high.
#define VignetteRadius 1.00 //[-1.00 to 3.00] lower values = stronger radial effect from center
#define VignetteAmount -1.00 //[-2.00 to 1.00] Strength of black. -2.00 = Max Black, 1.00 = Max White.
#define VignetteSlope 2 //[2 to 16] How far away from the center the change should start to really grow strong (odd numbers cause a larger fps drop than even numbers)
#define VignetteCenter float2(0.500, 0.500) //[0.000 to 1.000, 0.000 to 1.000] Center of effect for VignetteType 1. 2 and 3 do not obey this setting.
/*-----------------------------------------------------------.
/ Dither settings /
'-----------------------------------------------------------*/
#define dither_method 1 //[1 or 2] 1 = Ordered dithering (very good and very fast), 2 = Random dithering (different but slightly slower dithering)
//Note that the patterns used by Dither, makes an image harder to compress.
//This can make your screenshots and video recordings take up more space.
/*-----------------------------------------------------------.
/ Border settings /
'-----------------------------------------------------------*/
#define border_width float2(0,1) //[0 to 2048, 0 to 2048] (X,Y)-width of the border. Measured in pixels. If this is set to 0,0 then the border_ratio will be used instead
#define border_ratio float(2.35 / 1.0) //[0.1000 to 10.0000] Set the desired ratio for the visible area. You MUST use floating point - Integers do not work right.
//Examples that work: (1680.0 / 1050.0), (16.0 / 10.0), (1.6) Examples that does NOT work right: (1680 / 1050), (16 / 10)
#define border_color float3(180, 0, 0) //[0 to 255, 0 to 255, 0 to 255] What color the border should be. In integer RGB colors, meaning 0,0,0 is black and 255,255,255 is full white.
/*-----------------------------------------------------------.
/ Splitscreen settings /
'-----------------------------------------------------------*/
#define splitscreen_mode 1 //[1|2|3|4|5|6] 1 = Vertical 50/50 split, 2 = Vertical 25/50/25 split, 3 = Vertical 50/50 angled split, 4 = Horizontal 50/50 split, 5 = Horizontal 25/50/25 split, 6 = Curvy vertical 50/50 split
/*-----------------------------------------------------------.
/ Transition /
'-----------------------------------------------------------*/
#define Transition_time 5000 //[1 to 60000] Milliseconds the transition lasts (1000 milliseconds is 1 second)
#define Transition_texture "Winners_Dont_Use_Drugs.png" //["filename"] Filename for the texture to use. Put your custom textures in SweetFX/Textures/
#define Transition_texture_width 720 //Image width.
#define Transition_texture_height 480 //Image height.
#define Transition_type ImageFadeOut //Can be "FadeIn", "FadeOut", "CurtainOpen", "CurtainClose" or "ImageFadeOut"
/*-----------------------------------------------------------.
/ Depth /
'-----------------------------------------------------------*/
#define Depth_z_near 0.01 //[0.00001 to 100000.0] Camera z near
#define Depth_z_far 100.00 //[0.00001 to 100000.0] Camera z far, must be further than the near value.
/*-----------------------------------------------------------.
/ Custom settings /
'-----------------------------------------------------------*/
#define custom_strength 1.1 //[0.00 to 1.00] Adjust the strength of the effect


Sweetfx 2.0 here
Ofc it's full of viruses and russian hackers.
http://rgho.st/6V4nrj8xl
Where do I get 2.0 now for sweetfx?!?!
ok oddly (the same thing happened for Battlefront) the only way to get it to work for me is to use radpro. not sure why the regular way isn't having it but hey ho! :)
Oh, i pretty much won't do a fresh install just for one game - my system is so modified and tweaked its just not worth the time and all my other games work fine so not sure why i cannot get this one going.. c'est la vie!- if i cannae get one working vanilla it'll have to be.. for now heheh ;)
Again thanks for the help, i'm sure i'll have another go at some point (i kept the launcher so maybe that trick will do it, I'll let u know!)
tbh im fed op of wasting time on this now. uninstalled, will try steam version but if that doesnt work feck it.
Hi, thanks for your suggestions but the most i get is a white screen crash now - i have also tried ALL my working preset/files from other games and only get this crash...
Avarage fps drop i get with sweetfx is 10fps, if you are getting much more than this, perhaps you need check the drivers.
On win10 set all 3 .exe to run as admin (you need do that even if you are pc administrator). Did you try download the compiled pack above instead of preset?
There is a slight fps drop under dx10,11 with reshade, although fps remains same on dx9.
update.
just did a clean install of win10 on one of pcs here and noticed some issues with steam version, even without sweetfx. I managed to fix the steam version copying launcher from standalone version. Now with game working, i finally put sweetfx and its running flawlessly... note that older versions of sweetfx may work, but you will get a dx error.
I also tried injecting using Radeon Pro and killing EVGA Precision X in case of conflict...meh
Hmm, well I simply cannot get any version of Sweetfx/Reshade to work at all with Warframe - I have tried this and many several to no avail.
W10x64 - really baffled as to why!
I seem to get a huge fps decrease using this SweetFX. I have all the stuff on the launcher, like 64-bit, fullscreen, etc.
Is this SweetFX supposed to have an effect on my performance?
nice
i can't seem to get rid of the half grey frames, tried turning of directx 11 but my game just shows a blackscreen, seems to be running as i can hear the soundfx but no video. any suggestions? Thank you!!!
Oh someone on the warframe forums said to disable directx 11 in the launcher and so far no more half grey frames.
This happens from time to time http://puu.sh/8S1bG.png no idea why.
Try other missions, the game itself force color the missions, sometimes blue, yellow, green its random, you can use scroll-lock to disable all effects.
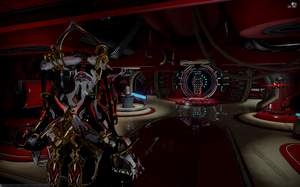
theres no color imposed by this preset, as you can observe on screenshots.
too much.....yellow..ish?
i mean it even in the corpus ships. and in opens spaces i just can't handle it XD
v3.2 more color and shadow tweaks.
no download the preset and put it together with base files.
does this contain 3.1
--> http://bit.ly/1ndwu5p?
All files have the same modified date...?
does this contain 3.1
--> http://bit.ly/1ndwu5p?
All files have the same modified date...?
further color tweaks on v3.1
yes i slightly desaturated it because of color correction that's already too Strong, but each monitor is different, tweaks are always needed.
About evga precision, it wont work because of sweetfx dll injection. Rivatuner cant overwrite it.
Now I just need to get EVGA Precision working in Warframe x64... :(
Thanks though! These are the best custom settings I seen. Made some tweeks to saturation and other places. But great all around.
Cool =)
Ok. Got it working with Steam.
You need to put everything in the main Warframe directory. Not "Tools". Check x64 in WF launcher settings as you mentioned.
Oh but you are using the x64 with SweetFX 1.4? Ok. I will enable x64 and try your settings again.
Oh but you are using the x64 with SweetFX 1.4? Ok. I will enable x64 and try your settings again.
i dont know how it works on steam but make sure x64 is checked and try disable dx11... if its work then there is a incompatibility with dxgi.dll
Im not using steam version, try copy the shaders folder and replace yours. btw the injector are the d3d9.dll or dxgi.dll
The injector is also not included in your .zip.
Your settings look fantastic by the way. I hope I can get them to work.
Are you using the Steam version?
I can get your SweetFX_Settings.txt to work but when I add your shaders the game crashes before it can load.
When using 1.4 I have to put the files in Tools or it will not work.
Advice?
You're welcome
Very nice thanks