I'd like to thank the creators of the other Presets here. Their presets helped me in learning which Shaders to use.
I've also made a Steam Guide for this
https://steamcommunity.com/sharedfiles/filedetails/?id=2256621869
Before you start
I suggest first putting the game into Windows mode in the Graphics Options. I personally gained a noticeable boost in stability and latency once I did.
Also by default I left the Sharpening shader off. If you want to push the visuals a bit more I describe how to turn it on in the "What each Shader does" section.
Important if you play Online - Apparently if you have things added to your game folder you won't be able to see other people in multiplayer and you'll have to send a direct invite. I haven't tested this but be warned if you plan to play online (If you can even find a match)
How to Download and Use Reshade
Step 1 - Go to
https://reshade.me/ and download the latest version. Once done start it up
Step 2 - Select the Injustice application and then select DirectX9
Step 3 - Check the "SweetFX" Shader option then press OK
Step 4 - For "Standard Effects" you can go ahead and Uncheck All, then press OK.
Afterwards for "SweetFX", Uncheck All again but then check on Curves, FakeHDR, LumaSharpen, Tonemap. These are the effects we'll be using.
Then you can "Uncheck All" and check on Curves, FakeHDR, LumaSharpen, Tonemap.
Adding Preset
First find the folder where you installed Injustice.
If you have it on Steam; Open Steam, go to Library, right-click on Injustice, Go to "Manage" and then click on "Browse Local Files".
Here you can find a file called "DefaultPreset.ini". Replace it with the Preset downloaded here.
What each Shader does
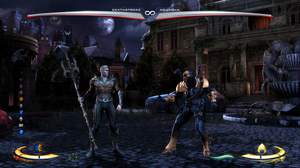
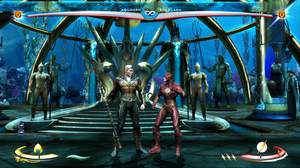
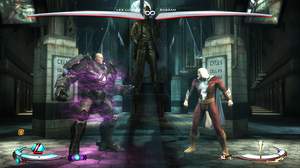
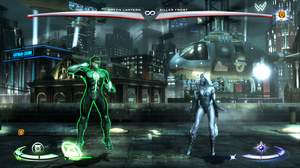
Tonemap - This has the biggest effect visually. Injustice's colours normally have low saturation, which is why it looks like there's a grey filter throughout the game; This setting increases the saturation and makes the game look more vibrant.
To adjust how strong you want colours, change the Saturation option. To adjust brightness change Gamma
Curves - Adjusts the contrast. This is Off by default but if you've turned off HDR I suggest turning this On.
These other 2 are more luxury settings. You can turn them off if they're affecting your framerate or latency.
HDR/FakeHDR - This gives the colour exposure / contrasts of the game a wider range so things will stand out from each other more. It can make the game look REALLY good but the contrast strength might be too strong for some.
Increasing Power makes the game darker; Lowering it makes it brighter.
If your PC can handle it you can increase the range by lowering Radius 1 to make the effect better looking.
LumaSharpen - This makes the game models clearer. You'll be able to more easily see the detail on character models / stage backgrounds.
By default this option is turned off since HDR is already on. If your PC can handle it you can have both.