/*-----------------------------------------------------------.
/ Description /
'------------------------------------------------------------/
Game: Final Fantasy XIV ARR
SweetFX version: 1.4
Author: CeeJay.dk Boulotor2024 ninjafada
Description: added fxaa and some sharpening, contrast a little tweaked
v9 trying some colors tweaks and sharpening tweaks
/*-----------------------------------------------------------.
/ Choose effects /
'-----------------------------------------------------------*/
// Set to 1 for ON or 0 for OFF
#define USE_SMAA_ANTIALIASING 0 //[0 or 1] SMAA Anti-aliasing : Smoothens jagged lines using the SMAA technique.
#define USE_FXAA_ANTIALIASING 1 //[0 or 1] FXAA Anti-aliasing : Smoothens jagged lines using the FXAA technique
#define USE_CARTOON 0 //[0 or 1] Cartoon : "Toon"s the image.(Interferes with SMAA, CRT, Bloom, HDR and Lumasharpen)
#define USE_TVLEVELS 0 //[0 or 1] TVLevels : Adjusts the brightness/darkness of the scene with a straight line instead of a curve.
#define USE_ADVANCED_CRT 0 //[0 or 1] Advanced CRT : Simulates an old CRT TV display. Set gaussian blur along with it to get a halation effect
#define USE_BLOOM 0 //[0 or 1] Bloom : Makes bright lights bleed their light into their surroundings (relatively high performance cost)
#define USE_HDR 1 //[0 or 1] HDR : Not actual HDR - It just tries to mimic an HDR look (relatively high performance cost)
#define USE_LUMASHARPEN 1 //[0 or 1] LumaSharpen : Also sharpens the antialiased edges which makes them less smooth - I'm working on fixing that.
#define USE_GAUSSIAN 0 //[0 or 1] Gaussian Blur : can be used to... blur, but also bloom/hazy/glowy look, also unsharp masking
#define USE_FILMGRAIN 0 //[0 or 1] Filmgrain effect
#define USE_TECHNICOLOR 0 //[0 or 1] TECHNICOLOR : Attempts to mimic the look of an old movie using the Technicolor three-strip color process (Techicolor Process 4)
#define USE_DPX 0 //[0 or 1] Cineon DPX : Should make the image look like it's been converted to DXP Cineon - basically it's another movie-like look similar to technicolor.
#define USE_MONOCHROME 0 //[0 or 1] Monochrome : Monochrome makes the colors disappear.
#define USE_LIFTGAMMAGAIN 1 //[0 or 1] Lift Gamma Gain : Adjust brightness and color of shadows, midtones and highlights (avoids clipping)
#define USE_TONEMAP 0 //[0 or 1] Tonemap : Adjust gamma, exposure, saturation, bleach and defog. (may cause clipping)
#define USE_VIBRANCE 0 //[0 or 1] Vibrance : Intelligently saturates (or desaturates if you use negative values) the pixels depending on their original saturation.
#define USE_CURVES 1 //[0 or 1] Curves : Contrast adjustments using S-curves.
#define USE_SEPIA 0 //[0 or 1] Sepia : Sepia tones the image.
#define USE_VIGNETTE 0 //[0 or 1] Vignette : Darkens the edges of the image to make it look more like it was shot with a camera lens. May cause banding artifacts.
#define USE_DITHER 1 //[0 or 1] Dither : Applies dithering to simulate more colors than your monitor can display. This lessens banding artifacts (mostly caused by Vignette)
#define USE_BORDER 0 //[0 or 1] Border : Makes the screenedge black as a workaround for the bright edge that forcing some AA modes sometimes causes.
#define USE_COLORBLIND 0 //[0 or 1] ColorBlind Correction: adjust the mode in the following section.
#define USE_SPLITSCREEN 0 //[0 or 1] Splitscreen : Enables the before-and-after splitscreen comparison mode.
/*-----------------------------------------------------------.
/ SMAA Anti-aliasing settings /
'-----------------------------------------------------------*/
#define SMAA_THRESHOLD 0.50 //[0.05 to 0.20] Edge detection threshold. If SMAA misses some edges try lowering this slightly. I prefer between 0.08 and 0.12.
#define SMAA_MAX_SEARCH_STEPS 0 //[0 to 98] Determines the radius SMAA will search for aliased edges
#define SMAA_MAX_SEARCH_STEPS_DIAG 0 //[0 to 16] Determines the radius SMAA will search for diagonal aliased edges
#define SMAA_CORNER_ROUNDING 0 //[0 to 100] Determines the percent of antialiasing to apply to corners. 0 seems to affect fine text the least so it's the default.
// -- Advanced SMAA settings --
#define COLOR_EDGE_DETECTION 1 //[0 or 1] 1 Enables color edge detection (slower but slightly more acurate) - 0 uses luma edge detection (faster)
#define SMAA_DIRECTX9_LINEAR_BLEND 0 //[0 or 1] Using DX9 HARDWARE? (software version doesn't matter) if so this needs to be 1 - If not, leave it at 0.
//Enable this only if you use a Geforce 7xxx series or older card, or a Radeon X1xxx series or older card.
/*-----------------------------------------------------------.
/ FXAA Anti-aliasing settings /
'-----------------------------------------------------------*/
#define FXAA_QUALITY__PRESET 39 //[1 to 39] Choose the quality preset. 39 is the highest quality.
#define fxaa_Subpix 0.200 //[0.000 to 1.000] Choose the amount of sub-pixel aliasing removal.
#define fxaa_EdgeThreshold 0.250 //[0.000 to 1.000] Edge detection threshold. The minimum amount of local contrast required to apply algorithm.
#define fxaa_EdgeThresholdMin 0.060 //[0.000 to 1.000] Darkness threshold. Trims the algorithm from processing darks.
/*-----------------------------------------------------------.
/ Cartoon settings /
'-----------------------------------------------------------*/
#define CartoonPower 0.2 //[0.1 to 10.0] Amount of effect you want.
/*-----------------------------------------------------------.
/ TVLevels settings /
'-----------------------------------------------------------*/
#define DARK_LEVEL 4.0 //[0 to 255] Darkness strength. Higher values mean darker shadows, 0 means no change. Default is 16.0
#define BRIGHT_LEVEL 4.0 //[0 to 255] Brightness strength. Higher values mean brighter lights, 0 means no change. Default is 20.0
/*-----------------------------------------------------------.
/ Advanced CRT settings /
'----------------------------------------------------------*/
#define CRTAmount 1.00 //[0.00 to 1.00] Amount of CRT effect you want
#define CRTResolutionX 512 //[1 to 2048] Original input width of the game (ie. 320)
#define CRTResolutionY 304 //[1 to 2048] Original input height of the game (ie. 240)
#define CRTgamma 2.4 //[0.0 to 4.0] Gamma of simulated CRT (default 2.4)
#define CRTmonitorgamma 2.2 //[0.0 to 4.0] Gamma of display monitor (typically 2.2 is correct)
#define CRTBrightness 0.9 //[1.0 to 3.0] Used to boost brightness a little. Default is 1.0
#define CRTScanlineIntensity 2.0 //[2.0 to 4.0] Scanlines intensity (use integer values preferably). Default is 2.0
#define CRTScanlineGaussian 1 //[0 or 1] Use the "new nongaussian scanlines bloom effect". Default is on
#define CRTCurvature 1 //[[0 or 1] "Barrel effect" enabled (1) or off (0)
#define CRTCurvatureRadius 1.5 //[0.0 to 2.0] Curvature Radius (only effective when Curvature is enabled). Default is 1.5
#define CRTCornerSize 0.0100 //[0.0000 to 0.0020] Higher values, more rounded corner. Default is 0.001
#define CRTDistance 2.00 //[0.00 to 4.00] Simulated distance from viewer to monitor. Default is 2.00
#define CRTAngleX 0.00 //[-0.20 to 0.20] Tilt angle in radians (X coordinates)
#define CRTAngleY -0.15 //[-0.20 to 0.20] Tilt angle in radians (Y coordinates). (Value of -0.15 gives the 'arcade tilt' look)
#define CRTOverScan 1.01 //[1.00 to 1.10] Overscan (e.g. 1.02 for 2% overscan). Default is 1.01
#define CRTOversample 0 //[0 or 1] Enable 3x oversampling of the beam profile (warning : performance hit)
/*-----------------------------------------------------------.
/ Bloom settings /
'-----------------------------------------------------------*/
#define BloomThreshold 20.25 //[0.00 to 50.00] Threshold for what is a bright light (that causes bloom) and what isn't.
#define BloomPower 1.446 //[0.000 to 8.000] Strength of the bloom
#define BloomWidth 0.0142 //[0.0000 to 1.0000] Width of the bloom
/*-----------------------------------------------------------.
/ HDR settings /
'-----------------------------------------------------------*/
#define HDRPower 1.01 //[0.00 to 8.00] Strangely lowering this makes the image brighter
#define radius2 0.78 //[0.00 to 8.00] Raising this seems to make the effect stronger and also brighter
/*-----------------------------------------------------------.
/ LumaSharpen settings /
'-----------------------------------------------------------*/
// -- Sharpening --
#define sharp_strength 0.90 //[0.10 to 3.00] Strength of the sharpening
#define sharp_clamp 0.035 //[0.000 to 1.000] Limits maximum amount of sharpening a pixel recieves - Default is 0.035
// -- Advanced sharpening settings --
#define pattern 2 //[1|2|3|4] Choose a sample pattern. 1 = Fast, 2 = Normal, 3 = Wider, 4 = Pyramid shaped.
#define offset_bias 1.0 //[0.0 to 6.0] Offset bias adjusts the radius of the sampling pattern.
//I designed the pattern for offset_bias 1.0, but feel free to experiment.
// -- Debug sharpening settings --
#define show_sharpen 0 //[0 or 1] Visualize the strength of the sharpen (multiplied by 4 to see it better)
/*-----------------------------------------------------------.
/ Gaussian Blur settings /
'-----------------------------------------------------------*/
#define GaussEffect 1 //[0|1|2|3] 0 = Blur, 1 = Unsharpmask (expensive), 2 = Bloom, 3 = Sketchy. Default is 2
#define GaussQuality 3 //[0|1|2|3] Warning: 2 and 3 are expensive. Default is 1
#define GaussSigma 1 //[1 to 4] The higher the wider blur/bloom is (only effective when Bloom selected)
#define GaussBloomWarmth 2 //[0|1|2] "Temperature" of the bloom - 0 = neutral, 1 = warm, 2 = hazy/foggy
#define GaussThreshold 0.50 //[0.00 to 1.00] [DX10/11 only] Threshold for what is a bright light (that causes bloom) and what isn't.
#define GaussExposure 43.0 //[0.00 to 100.00] [DX10/11 only] Exposure of the effect (the lower the brighter)
#define GaussStrength 0.045 //[0.00 to 1.00] Amount of effect blended into the final image
#define GaussStrengthc 0.010 //[0.00 to 1.00] Amount of effect blended into the final image
/*-----------------------------------------------------------.
/ Film grain settings /
'-----------------------------------------------------------*/
#define FilmGrainIntensity 0.46 //[0.00 to 1.00] Intensity of grain. Default is 0.46
#define FilmGrainExposure 40 //[0 to 100] Grain Exposure. Default is 40 (Lower -> darker noise)
#define FilmGrainSize 2 //[0 to 10] Size of the grain. Default is 2 (Higher -> thinner noise)
/*-----------------------------------------------------------.
/ TECHNICOLOR settings /
'-----------------------------------------------------------*/
#define TechniAmount 0.4 //[0.00 to 1.00]
#define TechniPower 4.0 //[0.00 to 8.00]
#define redNegativeAmount 0.88 //[0.00 to 1.00]
#define greenNegativeAmount 0.88 //[0.00 to 1.00]
#define blueNegativeAmount 0.88 //[0.00 to 1.00]
/*-----------------------------------------------------------.
/ Cineon DPX settings /
'-----------------------------------------------------------*/
#define Red 15.0 //[1.0 to 15.0]
#define Green 15.0 //[1.0 to 15.0]
#define Blue 15.0 //[1.0 to 15.0]
#define ColorGamma 2.5 //[0.1 to 2.5] Adjusts the colorfulness of the effect in a manner similar to Vibrance. 1.0 is neutral.
#define DPXSaturation 1.01 //[0.0 to 8.0] Adjust saturation of the effect. 1.0 is neutral.
#define RedC 0.21 //[0.60 to 0.20]
#define GreenC 0.21 //[0.60 to 0.20]
#define BlueC 0.20 //[0.60 to 0.20]
#define Blend 0.04 //[0.00 to 1.00] How strong the effect should be.
/*-----------------------------------------------------------.
/ Monochrome settings /
'-----------------------------------------------------------*/
#define Monochrome_conversion_values float3(0.18,0.41,0.41) //[0.00 to 1.00] Percentage of RGB to include (should sum up to 1.00)
/*-----------------------------------------------------------.
/ Lift Gamma Gain settings /
'-----------------------------------------------------------*/
#define RGB_Lift float3(1.000, 1.000, 1.000) //[0.000 to 2.000] Adjust shadows for Red, Green and Blue
#define RGB_Gamma float3(1.030, 1.030, 1.030) //[0.000 to 2.000] Adjust midtones for Red, Green and Blue
#define RGB_Gain float3(1.010, 1.010, 1.010) //[0.000 to 2.000] Adjust highlights for Red, Green and Blue
/*-----------------------------------------------------------.
/ Tonemap settings /
'-----------------------------------------------------------*/
#define Gamma 0.98 //[0.000 to 2.000] Adjust midtones
#define Exposure -0.001 //[-1.000 to 1.000] Adjust exposure
#define Saturation -0.001 //[-1.000 to 1.000] Adjust saturation
#define Bleach 0.110 //[0.000 to 1.000] Brightens the shadows and fades the colors
#define Defog 0.001 //[0.000 to 1.000] How much of the color tint to remove
#define FogColor float3(0.00, 2.55, 0.00) //[0.00 to 2.55, 0.00 to 2.55, 0.00 to 2.55] What color to remove - default is blue
/*-----------------------------------------------------------.
/ Vibrance settings /
'-----------------------------------------------------------*/
#define Vibrance -0.01 //[-1.00 to 1.00] Intelligently saturates (or desaturates if you use negative values) the pixels depending on their original saturation.
/*-----------------------------------------------------------.
/ Curves settings /
'-----------------------------------------------------------*/
#define Curves_mode 0 //[0|1|2] Choose what to apply contrast to. 0 = Luma, 1 = Chroma, 2 = both Luma and Chroma. Default is 0 (Luma)
#define Curves_contrast 0.25 //[-1.00 to 1.00] The amount of contrast you want
// -- Advanced curve settings --
#define Curves_formula 2 //[1|2|3|4|5|6|7|8|9] The contrast s-curve you want to use.
//1 = Sine, 2 = Abs split, 3 = Smoothstep, 4 = Exp formula, 5 = Simplified Catmull-Rom (0,0,1,1), 6 = Perlins Smootherstep
//7 = Abs add, 8 = Techicolor Cinestyle, 9 = Parabola.
//Note that Technicolor Cinestyle is practically identical to Sine, but runs slower. In fact I think the difference might only be due to rounding errors.
//I prefer 2 myself, but 3 is a nice alternative with a little more effect (but harsher on the highlight and shadows) and it's the fastest formula.
/*-----------------------------------------------------------.
/ Sepia settings /
'-----------------------------------------------------------*/
#define ColorTone float3(1.40, 1.10, 0.90) //[0.00 to 2.55, 0.00 to 2.55, 0.00 to 2.55] What color to tint the image
#define GreyPower 0.11 //[0.00 to 1.00] How much desaturate the image before tinting it
#define SepiaPower 0.58 //[0.00 to 1.00] How much to tint the image
/*-----------------------------------------------------------.
/ Vignette settings /
'-----------------------------------------------------------*/
#define VignetteRatio 1.00 //[0.15 to 6.00] Sets a width to height ratio. 1.00 (1/1) is perfectly round, while 1.60 (16/10) is 60 % wider than it's high.
#define VignetteRadius 1.00 //[-1.00 to 3.00] lower values = stronger radial effect from center
#define VignetteAmount -1.00 //[-2.00 to 1.00] Strength of black. -2.00 = Max Black, 1.00 = Max White.
#define VignetteSlope 8 //[1 to 16] How far away from the center the change should start to really grow strong (odd numbers cause a larger fps drop than even numbers)
#define VignetteCenter float2(0.500, 0.500) //[0.000 to 1.000, 0.000 to 1.000] Center of effect.
/*-----------------------------------------------------------.
/ Dither settings /
'-----------------------------------------------------------*/
#define dither_method 2 //[1 or 2] 1 = Ordering dithering (good and very fast), 2 = Random dithering (even better dithering but not as fast)
//Note that the patterns used by Dither, makes an image harder to compress.
//This can make your screenshots and video recordings take up more space.
/*-----------------------------------------------------------.
/ Border settings /
'-----------------------------------------------------------*/
//No settings yet, beyond switching it on or off in the top section.
/*-----------------------------------------------------------.
/ ColorBlind mode settings /
'-----------------------------------------------------------*/
#define colorblind_mode 1 //[1|2|3] 1 = protonope, 2 = deuteranope, 3 = tritanope.
/*-----------------------------------------------------------.
/ Splitscreen settings /
'-----------------------------------------------------------*/
#define splitscreen_mode 1 //[1|2|3|4|5] 1 = Vertical 50/50 split, 2 = Vertical 25/50/25 split, 3 = Vertical 50/50 angled split, 4 = Horizontal 50/50 split, 5 = Horizontal 25/50/25 split
/*-----------------------------------------------------------.
/ Key settings /
'-----------------------------------------------------------*/
// This is the section where you can define your own key mapping
// See the following URL to find out what keycode a key has:
// http://www.cambiaresearch.com/articles/15/javascript-char-codes-key-codes
// key_toggle_sweetfx = 93
// key_screenshot = 44
// key_reload_sweetfx = 19
/*-----------------------------------------------------------.
/ Misc settings /
'-----------------------------------------------------------*/
// You can load and chain other DirectX wrappers (ENB, Helix, Windower...)
// If the external wrapper is already named d3d9.dll, rename it into
// something else like "d3d9_enb.dll" (note that even if this is commented it actually works)
// external_d3d9_wrapper = none
// external_dxgi_wrapper = none
don't remove hdr from the game it's not the same as the one in sweetfx
for fxaa you can remove it to gain fps
you may adjust #define sharp_strength 0.90
from 0.50 to 1.50 as you prefer
Do you need to disable the in-game HDR and FXAA for this to work it's best?
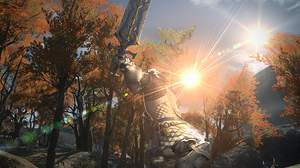
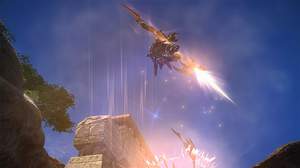
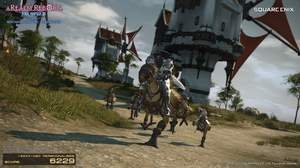
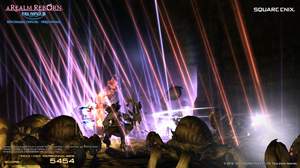
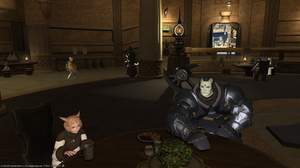
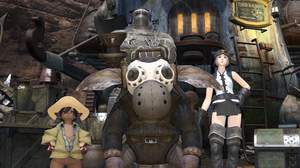
added 2 screenshots from the last benchmark without AA, to show my fxaa setting powa !
. fixed by disable OSD overlay from MSI afterburner
http://ninjafada.com/ffxiv/ARR/p3/p3v9.rar
after put this file in folder game cannot start ( FFXIV error after start )
did i miss something?
Thanks
Thanks, the tool is nice. ^^
about the other questions
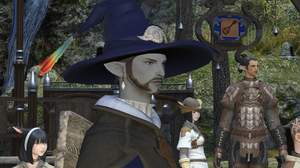
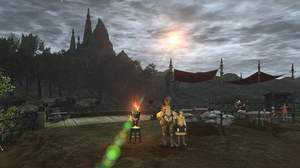
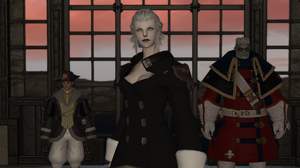
http://sfx.thelazy.net/games/screenshot/2223 was a screenshot provided by the devs i used a lot a filter on it but the problem they changed a lot of things since so we can't have the same result without having problem in other place , like donjon or sunset
for SMAA you can use it instead of FXAA but it makes the chat font dirty , my FXAA is very light it doesn't blur away and the lumasharpen works after i thing
you can test your screenshot i included the DX9IV.exe drag n drop the screenshot on it and it will be opened with sweetfx
Yes i know that key, thanks. =)
As for us being able to see the changes while in-game is awesome, no need to alt-tab, windowed mode is much faster =)
Thanks again, now need to wait for the beta ;_;
yes you can alt tab, edit and save
press pause in game it will reload
i changed the button for the toggle off/on to menu/select it's the key between the win right et ctrl right, it open a context menu most of the time
Sorry to post again, forgot something.
Can we tweak the settings while the game is open? I mean, in a way that we can see the changes in-game.
PS: Bolotaur's SFX doesn't let me use the Enable/Disable button so i don't even know if SFX is enabled or not (but i think it is because it looks sharper).
Cheers.
So i don't need Bolotaur's SFX anymore?
I'd rather have a version with decent AA (SMAA) than the current FXAA because a lot of stuff is pixelated in the distance.
Anyway i linked that preset because of this shot, i really like the colors: http://sfx.thelazy.net/games/screenshot/2223/
I'm not sure what you did, either HDR and/or bloom, the light also looks great, sadly i can't try this preset nor the one linked because the beta is only on Friday ._.
Thanks anyway.
you have the last rar in the preset description
you can use any on the preset i put here with
You said you'd link this package: http://sfx.thelazy.net/games/preset/399/
But you never did =(