//++++++++++++++++++++++++++++++++++++++++++++++++++++++++++++++++++
// ReShade effect file
// visit facebook.com/MartyMcModding for news/updates
//++++++++++++++++++++++++++++++++++++++++++++++++++++++++++++++++++
// MasterEffect ReBorn 1.1.287 public beta by Marty McFly
// Continuation of MasterEffect 1.6.1
// Copyright © 2008-2015 Marty McFly
/*==============================================================================*\
| Wolfenstein: The New Order Defined by Bopper2010
Copy Reshade64.dll and Rename it to opengl32.dll |
\*==============================================================================*/
//++++++++++++++++++++++++++++++++++++++++++++++++++++++++++++++++++
/*==============================================================================*\
| GLOBAL PARAMETERS |
\*==============================================================================*/
#define MASTEREFFECT_TOGGLEKEY 0x91 //[depending on keyboard layout] Key used to toggle all MasterEffect effects. See ReShade documentation for more info.
#define USE_DEPTHBUFFER_OUTPUT 0 //[0 or 1] Depth Buffer Output: Shows you the pixel depth, this is for debugging or depth map creation only.
#define USE_SPLITSCREEN 0 //[0 or 1] Splitscreen: Disables all effects on the right half of the screen to show changes.
#define USE_HDR_LEVEL 0 //[0 to 2] HDR Level: Rendering bitrate. 0: RGBA8 | 1: RGBA16F | 2: RGBA32F
#define USE_HUD_MASKING 0 //[0 or 1] HUD Masking: Uses a texture mask (mcmask.png) to exclude certain screen areas from effects processing.
/*==============================================================================*\
| ENABLE EFFECTS |
\*==============================================================================*/
//COLOR
#define USE_LUT 0 //[0 or 1] Color Lookup Table: Uses a gradient texture to adjust the colors of the image.
#define USE_CARTOON 0 //[0 or 1] Cartoon : "Toon"s the image.
#define USE_LEVELS 0 //[0 or 1] Levels : Sets a new black and white point. This increases contrast but causes clipping. Use Curves instead if you want to avoid that.
#define USE_TECHNICOLOR 0 //[0 or 1] Technicolor : Attempts to mimic the look of an old movie using the Technicolor three-strip color process. Algorithm from prod80
#define USE_SWFX_TECHNICOLOR 0 //[0 or 1] Technicolor : Attempts to mimic the look of an old movie using the Technicolor three-strip color process. Algorithm from SweetFX
#define USE_DPX 0 //[0 or 1] Cineon DPX : Should make the image look like it's been converted to DXP Cineon - basically it's another movie-like look similar to technicolor.
#define USE_MONOCHROME 0 //[0 or 1] Monochrome : Monochrome makes the colors disappear. No control values.
#define USE_LIFTGAMMAGAIN 0 //[0 or 1] Lift Gamma Gain : Adjust brightness and color of shadows, midtones and highlights.
#define USE_TONEMAP 1 //[0 or 1] Tonemap : Adjust gamma, exposure, saturation, bleach and defog. (may cause clipping).
#define USE_VIBRANCE 0 //[0 or 1] Vibrance : Intelligently saturates (or desaturates if you use negative values) the pixels depending on their original saturation.
#define USE_CURVES 1 //[0 or 1] Curves : Contrast adjustments using S-curves.
#define USE_SEPIA 0 //[0 or 1] Sepia : Sepia tones the image.
#define USE_SKYRIMTONEMAP 0 //[0 or 1] Skyrim Tonemap: Applies color correction/tonemapping based on tonemappers of popular Skyrim ENB's.
#define USE_COLORMOOD 0 //[0 or 1] Color Mood: Applies a "mood" to the color, tinting mainly the dark colors.
#define USE_CROSSPROCESS 0 //[0 or 1] Cross Processing: Simulates wrong chemistry in color processing.
#define USE_FILMICPASS 0 //[0 or 1] Filmic Pass: Applies some common color adjustments to mimic a more cinema-like look.
#define USE_REINHARD 0 //[0 or 1] Reinhard: This is the Reinhard tonemapping shader, if you are interested, google how it works.
#define USE_REINHARDLINEAR 0 //[0 or 1] Reinhard: Reinhard mixed with some linear tonemapping.
#define USE_COLORMOD 0 //[0 or 1] Colormod: Contrast, Saturation and Brightness ported from colormod.asi.
#define USE_SPHERICALTONEMAP 0 //[0 or 1] Spherical Tonemap: Another approach on tonemapping, uses some sphere algorithms.
#define USE_HPD 0 //[0 or 1] Haarm Peter Duiker Filmic Tonemapping: Tonemapping used in Watch Dogs, ripped from the Watch Dogs shaders themselves.
#define USE_FILMICCURVE 0 //[0 or 1] Filmic Curve: Improved version of the well-known Uncharted 2 filmic curve, first seen in iCEnhancer 0.3.
#define USE_WATCHDOG_TONEMAP 0 //[0 or 1] Watch Dogs Tonemap: Enables one of the numerous watch dogs tonemapping algorithms. No tweaking values.
#define USE_SINCITY 0 //[0 or 1] Sin City: Effect from the movie "Sin City" - everything else than red is grey.
#define USE_COLORHUEFX 0 //[0 or 1] Color Hue FX: Desaturates everything but colors from a fixed hue mid and the range around it. Similiar to Sin City but much better. Thanks, prod80!
//LIGHTING
#define USE_LENSDIRT 0 //[0 or 1] Lensdirt: Simulates a dirty camera lens. IMPORTANT: bloom threshold and amount have influence on the intensity of the dirt!
#define USE_GAUSSIAN_ANAMFLARE 0 //[0 or 1] Gaussian Anamflare: Applies a horizontal light beam to bright pixels.
#define USE_BLOOM 0 //[0 or 1] Bloom: Makes bright lights bleed their light into their surroundings. NOT the SweetFX way to do bloom but a more proper way.
#define USE_LENZFLARE 0 //[0 or 1] Lenz Flare: Boris Vorontsov's Skyrim Lensflare with custom offsets, ported to MasterEffect.
#define USE_CHAPMAN_LENS 0 //[0 or 1] Chapman's lensflare: Simple lensflare shader with one big halo.
#define USE_GODRAYS 0 //[0 or 1] Godrays: Adds some light rays rotating around screen center.
#define USE_ANAMFLARE 0 //[0 or 1] Anamorphic Lensflare: adds some horizontal light flare, simulating the use of an anamorphic lens while recording.
//DEPTH BASED
#define USE_AMBIENTOCCLUSION 0 //[0 or 1] Ambient Occlusion: Enables physically incorrect shading that most newer gen games use. Multiple algorithms available.
#define USE_DEPTHOFFIELD 0 //[0 or 1] Depth of Field: Simulates out of focus blur of a camera. Multiple algorithms available.
//IMAGE ENHANCEMENTS
#define USE_SHARPENING 1 //[0 or 1] Sharpen: Sharps the image but may increase aliasing
#define USE_FISHEYE_CA 0 //[0 or 1] Fisheye lens & Chromatic Aberration: Adds some RGB shift in colors and distorts image to look like the "fisheye" effect.
#define USE_GRAIN 0 //[0 or 1] Grain: Adds some image grain, looks like when a TV has no signal.
#define USE_EXPLOSION 0 //[0 or 1] Explosion : Scatters the pixels, making the image look fuzzy.
#define USE_SMAA 0 //[0 or 1] SMAA Anti-aliasing : Smoothens jagged lines using the SMAA technique.
#define USE_HEATHAZE 0 //[0 or 1] Heat Haze: Convection in heated air causes the temperature of the air to vary and causes a shimmery effect that distorts whatever is behind.
#define USE_LED_SHADER 0 //[0 or 1] LED: Simulates the look of a LED panel.
//OVERLAYS
#define USE_HD6_VIGNETTE 0 //[0 or 1] HeliosDoubleSix Vignette: Adds some advanced vignette (darkening shader) to lead focus to screen center
#define USE_COLORVIGNETTE 0 //[0 or 1] Boris Vorontsov Vignette: Simple colorable version of vignette, darkens/tints the image at the corners
#define USE_BORDER 0 //[0 or 1] Border: Can be used to create letterbox borders around the image.
#define USE_MOVIEBARS 0 //[0 or 1] Movie Bars: blackens the image on the top and bottom, simulating a higher aspect ratio. Default set to 21:9 aspect ratio.
/*==============================================================================*\
| EFFECT PARAMETERS - COLOR |
\*==============================================================================*/
//COLOR LOOKUP TABLE
#define iLookupTableMode 1 //[1 or 2] 1: mclut.png (gradient) | 2: mclut3d (3D Photoshop LUT)
#define fLookupTableMix 0.4 //[0.0 to 1.0] Amount of color change by lookup table. 0.0 means no change, 1.0 means full effect.
//CARTOON
#define CartoonPower 4.5 //[0.1 to 10.0] Amount of effect you want.
#define CartoonEdgeSlope 1.5 //[0.1 to 8.0] Raise this to filter out fainter edges. You might need to increase the power to compensate. Whole numbers are faster.
//LEVELS
#define Levels_black_point 36 //[0 to 255] The black point is the new black - literally. Everything darker than this will become completely black. Default is 16.0
#define Levels_white_point 235 //[0 to 255] The new white point. Everything brighter than this becomes completely white. Default is 235.0
//TECHNICOLOR
#define ColStrengthR 0.2 //[0.05 to 1.0] Color Strength of Red channel. Higher means darker and more intense colors.
#define ColStrengthG 0.2 //[0.05 to 1.0] Color Strength of Green channel. Higher means darker and more intense colors.
#define ColStrengthB 0.2 //[0.05 to 1.0] Color Strength of Blue channel. Higher means darker and more intense colors.
#define TechniBrightness 1.0 //[0.5 to 1.5] Brightness Adjustment, higher means brighter image.
#define TechniStrength 1.0 //[0.0 to 1.0] Strength of Technicolor effect. 0.0 means original image.
#define TechniSat 0.7 //[0.0 to 1.5] Additional saturation control since technicolor tends to oversaturate the image.
//SWEETFX TECHNICOLOR
#define TechniAmount 0.4 //[0.00 to 1.00] Amount of color change you want
#define TechniPower 4.0 //[0.00 to 8.00] Power of color change
#define redNegativeAmount 0.88 //[0.00 to 1.00] controls for different technicolor power on the respective color channels
#define greenNegativeAmount 0.88 //[0.00 to 1.00]
#define blueNegativeAmount 0.88 //[0.00 to 1.00]
//DPX
#define DPXRed 15.0 //[1.0 to 15.0] Amount of DPX applies on Red color channel
#define DPXGreen 15.0 //[1.0 to 15.0] ""
#define DPXBlue 15.0 //[1.0 to 15.0] ""
#define DPXColorGamma 1.5 //[0.1 to 2.5] Adjusts the colorfulness of the effect in a manner similar to Vibrance. 1.0 is neutral.
#define DPXSaturation 1.4 //[0.0 to 8.0] Adjust saturation of the effect. 1.0 is neutral.
#define DPXRedC 0.30 //[0.60 to 0.20]
#define DPXGreenC 0.39 //[0.60 to 0.20]
#define DPXBlueC 0.34 //[0.60 to 0.20]
#define DPXBlend 0.012 //[0.00 to 1.00] How strong the effect should be.
//LIFTGAMMAGAIN
#define RGB_Lift float3(0.900, 0.900, 0.800) //[0.000 to 2.000] Adjust shadows for Red, Green and Blue.
#define RGB_Gamma float3(0.900, 0.900, 0.900) //[0.000 to 2.000] Adjust midtones for Red, Green and Blue
#define RGB_Gain float3(1.100, 1.100, 1.100) //[0.000 to 2.000] Adjust highlights for Red, Green and Blue
//TONEMAP
#define Gamma 1.000 //[0.000 to 2.000] Adjust midtones. 1.000 is neutral. This setting does exactly the same as the one in Lift Gamma Gain, only with less control.
#define Exposure 0.000 //[-1.000 to 1.000] Adjust exposure
#define Saturation -0.200 //[-1.000 to 1.000] Adjust saturation
#define Bleach 0.500 //[0.000 to 1.000] Brightens the shadows and fades the colors
#define Defog 0.020 //[0.000 to 1.000] How much of the color tint to remove
#define FogColor float3(0.00, 0.00, 2.55) //[0.00 to 2.55, 0.00 to 2.55, 0.00 to 2.55] What color to remove - default is blue
//VIBRANCE
#define Vibrance 0.45 //[-1.00 to 1.00] Intelligently saturates (or desaturates if you use negative values) the pixels depending on their original saturation.
#define Vibrance_RGB_balance float3(1.00, 1.00, 1.00) //[-10.00 to 10.00,-10.00 to 10.00,-10.00 to 10.00] A per channel multiplier to the Vibrance strength so you can give more boost to certain colors over others
//CURVES
#define Curves_mode 0 //[0|1|2] Choose what to apply contrast to. 0 = Luma, 1 = Chroma, 2 = both Luma and Chroma. Default is 0 (Luma)
#define Curves_contrast 0.45 //[-1.00 to 1.00] The amount of contrast you want
// -- Advanced curve settings --
#define Curves_formula 3 //[1|2|3|4|5|6|7|8|9|10] The contrast s-curve you want to use.
//1 = Sine, 2 = Abs split, 3 = Smoothstep, 4 = Exp formula, 5 = Simplified Catmull-Rom (0,0,1,1), 6 = Perlins Smootherstep
//7 = Abs add, 8 = Techicolor Cinestyle, 9 = Parabola, 10 = Half-circles.
//Note that Technicolor Cinestyle is practically identical to Sine, but runs slower. In fact I think the difference might only be due to rounding errors.
//I prefer 2 myself, but 3 is a nice alternative with a little more effect (but harsher on the highlight and shadows) and it's the fastest formula.
//SEPIA
#define ColorTone float3(1.40, 1.10, 0.90) //[0.00 to 2.55, 0.00 to 2.55, 0.00 to 2.55] What color to tint the image
#define GreyPower 0.11 //[0.00 to 1.00] How much desaturate the image before tinting it
#define SepiaPower 0.58 //[0.00 to 1.00] How much to tint the image
//SKYRIM TONEMAPPING
#define POSTPROCESS 6 //[1 to 6] Mode of postprocessing you want. Mode 1 uses V1 values, Mode 2 uses V2 values etc
//
#define EAdaptationMinV1 0.05
#define EAdaptationMaxV1 0.125
#define EContrastV1 1.0
#define EColorSaturationV1 1.0
#define EToneMappingCurveV1 6.0
//
#define EAdaptationMinV2 0.36
#define EAdaptationMaxV2 0.29
#define EToneMappingCurveV2 8.0
#define EIntensityContrastV2 2.5
#define EColorSaturationV2 3.2
#define EToneMappingOversaturationV2 180.0
//
#define EAdaptationMinV3 0.001
#define EAdaptationMaxV3 0.025
#define EToneMappingCurveV3 30.0
#define EToneMappingOversaturationV3 111160.0
//
#define EAdaptationMinV4 0.2
#define EAdaptationMaxV4 0.125
#define EBrightnessCurveV4 0.7
#define EBrightnessMultiplierV4 0.45
#define EBrightnessToneMappingCurveV4 0.3
//
#define EAdaptationMinV5 0.08
#define EAdaptationMaxV5 0.20
#define EToneMappingCurveV5 8
#define EIntensityContrastV5 3.475
#define EColorSaturationV5 4
#define HCompensateSatV5 2
#define EToneMappingOversaturationV5 180.0
//
#define EBrightnessV6Day 2.5
#define EIntensityContrastV6Day 1.5
#define EColorSaturationV6Day 2.0
#define HCompensateSatV6Day 3.0
#define EAdaptationMinV6Day 0.64
#define EAdaptationMaxV6Day 0.24
#define EToneMappingCurveV6Day 8
#define EToneMappingOversaturationV6Day 2500.0
//COLORMOOD
#define fRatio 0.5 //[0.00 to 3.00] Amount of moody coloring you want
#define moodR 1.0 //[0.0 to 2.0] How strong dark red colors shall be boosted
#define moodG 1.0 //[0.0 to 2.0] How strong dark green colors shall be boosted
#define moodB 0.4 //[0.0 to 2.0] How strong dark blue colors shall be boosted
//CROSSPROCESS
#define CrossContrast 0.95 //[0.5 to 2.00] The names of these values should explain their functions
#define CrossSaturation 1.12 //[0.5 to 2.00]
#define CrossBrightness -0.052 //[-0.3 to 0.30]
#define CrossAmount 1.0 //[0.05 to 1.5]
//FILMICPASS
#define Strenght 0.725 //[0.05 to 1.5] Strength of the color curve altering
#define BaseGamma 1.6 //[0.7 to 2.0] Gamma Curve
#define Fade 0.2 //[0.0 to 0.6] Decreases contrast to imitate faded image
#define Contrast 1.0 //[0.5 to 2.0] Contrast.
#define FSaturation -0.15
#define FBleach 0.005 //[-0.5 to 1.0] More bleach means more contrasted and less colorful image
#define FRedCurve 6.0
#define FGreenCurve 6.0
#define FBlueCurve 6.0
#define BaseCurve 1.5
#define EffectGammaR 1.0
#define EffectGammaG 1.0
#define EffectGammaB 1.0
#define EffectGamma 0.75
#define Linearization 1.3 //[0.5 to 2.0] Linearizes the color curve
//REINHARD TONEMAP
#define ReinhardWhitepoint 4.0 //[1.0 to 10.0] Point above which everything is pure white
#define ReinhardScale 0.5 //[0.0 to 2.0] Amount of applied tonemapping
//REINHARD LINEAR TONEMAP
#define ReinhardLinearWhitepoint 4.4
#define ReinhardLinearPoint 0.06
#define ReinhardLinearSlope 2.25 //[1.0 to 5.0] how steep the color curve is at linear point. You need color curve understanding to know what this means, just experiment.
//COLORMOD
#define ColormodChroma 0.78 // Saturation
#define ColormodGammaR 1.05 // Gamma for Red color channel
#define ColormodGammaG 1.05 // Gamma for Green color channel
#define ColormodGammaB 1.05 // Gamma for Blue color channel
#define ColormodContrastR 0.50 // Contrast for Red color channel
#define ColormodContrastG 0.50 // ...
#define ColormodContrastB 0.50 // ...
#define ColormodBrightnessR -0.08 // Brightness for Red color channel
#define ColormodBrightnessG -0.08 // ...
#define ColormodBrightnessB -0.08 // ...
//SPHERICAL TONEMAP
#define sphericalAmount 1.0 //[0.0 to 2.0] Amount of spherical tonemapping applied...sort of
//COLOR HUE FX
#define USE_COLORSAT 0 //[0 or 1] This will use original color saturation as an added limiter to the strength of the effect
#define hueMid 0.6 //[0.0 to 1.0] Hue (rotation around the color wheel) of the color which you want to keep
#define hueRange 0.1 //[0.0 to 1.0] Range of different hue's around the hueMid that will also kept. Using a max range of 1.0 will allow the reverse of the effect where it will only filter a specific hue to B&W
#define satLimit 2.9 //[0.0 to 4.0] Saturation control, better keep it higher than 0 for strong colors in contrast to the gray stuff around
#define fxcolorMix 0.8 //[0.0 to 1.0] Interpolation between the original and the effect, 0 means full original image, 1 means full grey-color image.
/*==============================================================================*\
| EFFECT PARAMETERS - LIGHTING |
\*==============================================================================*/
//LENSDIRT
#define fLensdirtIntensity 3.0 //[0.0 to 2.0] Intensity of lensdirt.
#define fLensdirtSaturation 4.0 //[0.0 to 2.0] Color saturation of lensdirt.
#define fLensdirtTint float3(1.0,1.0,1.0) //[0.0 to 1.0] R, G and B components of lensdirt tintcolor the lensdirt color gets shifted to.
#define iLensdirtMixmode 2 //[1 to 4] 1: Linear add | 2: Screen add | 3: Screen/Lighten/Opacity | 4: Lighten
//GAUSSIAN ANAMORPHIC LENSFLARE
#define fAnamFlareThreshold 0.90 //[0.1 to 1.0] Every pixel brighter than this value gets a flare.
#define fAnamFlareWideness 2.4 //[1.0 to 2.5] Horizontal wideness of flare. Don't set too high, otherwise the single samples are visible
#define fAnamFlareAmount 14.5 //[1.0 to 20.0] Intensity of anamorphic flare.
#define fAnamFlareCurve 1.2 //[1.0 to 2.0] Intensity curve of flare with distance from source
#define fAnamFlareColor float3(0.012,0.313,0.588) //[0.0 to 1.0] R, G and B components of anamorphic flare. Flare is always same color.
//BLOOM
#define iBloomMixmode 2 //[1 to 4] 1: Linear add | 2: Screen add | 3: Screen/Lighten/Opacity | 4: Lighten
#define fBloomThreshold 0.6 //[0.1 to 1.0] Every pixel brighter than this value triggers bloom.
#define fBloomAmount 0.3 //[1.0 to 20.0] Intensity of bloom.
#define fBloomSaturation 0.8 //[0.0 to 2.0] Bloom saturation. 0.0 means white bloom, 2.0 means very very colorful bloom.
#define fBloomTint float3(0.7,0.8,1.0) //[0.0 to 1.0] R, G and B components of bloom tintcolor the bloom color gets shifted to.
//LENZ FLARE
#define LENZDEPTHCHECK 1 //[0 or 1] if 1, only pixels with depth = 1 get lens flare, this prevents white objects from getting flare source which would normally happen in LDR
#define fLenzIntensity 1.0 //[0.2 to 3.0] power of lens flare effect
#define fLenzThreshold 0.8 //[0.6 to 1.0] Minimum brightness an object must have to cast lensflare
//CHAPMAN LENS
#define CHAPMANDEPTHCHECK 1 //[0 or 1] if 1, only pixels with depth = 1 get lensflares, this prevents white objects from getting lensflare source which would normally happen in LDR
#define ChapFlareTreshold 0.9 //[0.7 to 0.99] Brightness threshold for lensflare generation. Everything brighter than this value gets a flare.
#define ChapFlareCount 15 //[1 to 20] Number of single halos to be generated. If set to 0, only the curved halo around is visible.
#define ChapFlareDispersal 0.25 //[0.25 to 1.0] Distance from screen center (and from themselves) the flares are generated.
#define ChapFlareSize 0.45 //[0.2 to 0.8] Distance (from screen center) the halo and flares are generated.
#define ChapFlareCA float3(0.0,0.01,0.02) //[-0.5 to 0.5] Offset of RGB components of flares as modifier for Chromatic abberation. Same 3 values means no CA.
#define ChapFlareIntensity 100.0 //[5.0 to 20.0] Intensity of flares and halo, remember that higher threshold lowers intensity, you might play with both values to get desired result.
//GODRAYS
#define bGodrayDepthCheck 1 //[0 or 1] if 1, only pixels with depth = 1 get godrays, this prevents white objects from getting godray source which would normally happen in LDR
#define iGodraySamples 128 //[2^x format] How many samples the godrays get
#define fGodrayDecay 0.99 //[0.5 to 0.9999] How fast they decay. It's logarithmic, 1.0 means infinite long rays which will cover whole screen
#define fGodrayExposure 1.0 //[0.7 to 1.5] Upscales the godray's brightness
#define fGodrayWeight 1.25 //[0.8 to 1.7] weighting
#define fGodrayDensity 1.0 //[0.2 to 2.0] Density of rays, higher means more and brighter rays
#define fGodrayThreshold 0.9 //[0.6 to 1.0] Minimum brightness an object must have to cast godrays
//ANAMORPHIC LENSFLARE
#define bFlareDepthCheckEnable 1 //[0 or 1] if 1, only pixels with depth = 1 get an anamflare, this prevents white objects from getting flare source which would normally happen in LDR
#define fFlareLuminance 0.95 //[0.6 to 1.0] bright pass luminance value
#define fFlareBlur 200.0 // [1.0 to 9999999] manages the size of the flare
#define fFlareIntensity 2.07 // [0.2 to 5.0] effect intensity
#define fFlareTint float3(0.137, 0.216, 1.0) // [0.0 to 2.0] effect tint RGB
/*==============================================================================*\
| EFFECT PARAMETERS - DEPTH BASED EFFECTS |
\*==============================================================================*/
/*==============================================================================*/
//AMBIENT OCCLUSION - GLOBAL PARAMETERS
#define AO_METHOD 6 //[1 to 2] 1: SSAO | 2: Raymarch AO | 3: HBAO | 4: SSGI | 5: Raymarch HBAO | 6: Alchemy SAO
#define AO_TEXSCALE 1.00 //[0.25 to 1.0] Scale of AO resolution, 1.0 means fullscreen. Lower resolution means less pixels to process and more performance but also less quality.
#define AO_SHARPNESS 0.8 //[0.05 to 2.0] 1: AO sharpness, higher means more sharp geometry edges but noisier AO, less means smoother AO but blurry in the distance.
#define AO_SHARPNESS_DETECT 2 //[1 or 2] AO must not blur over object edges. 1 : edge detection by depth (old) 2 : edge detection by normal (new). 2 is better but produces some black outlines.
#define AO_BLUR_STEPS 11 //[5 to 15] Offset count for AO smoothening. Higher means more smooth AO but also blurrier AO.
#define AO_DEBUG 0 //[0 to 2] Enables raw debug output. 1: occlusion | 2: color bouncing (SSGI only!)
#define AO_LUMINANCE_CONSIDERATION 1 //[0 or 1] Enables dampening of AO intensity on bright pixels, to preserve bright light sprites or beter lit areas. Not for GI!
#define AO_LUMINANCE_LOWER 0.3 //[0.0 to 1.0] Lower brightness threshold where AO starts to fade out. Below this threshold AO has full power.
#define AO_LUMINANCE_UPPER 0.8 //[0.0 to 1.0] Upper brightness threshold where AO starts to fade out. Above this threshold AO is 0.
#define AO_FADE_START 0.4 //[0.0 to 1.0] Distance from camera where AO starts to fade out. 0.0 means camera itself, 1.0 means infinite distance.
#define AO_FADE_END 0.9 //[0.0 to 1.0] Distance from camera where AO fades out completely. 0.0 means camera itself, 1.0 means infinite distance.
//AMBIENT OCCLUSION - SSAO
#define iSSAOSamples 16 //[32 to 128] Amount of samples. Don't set too high or shader compilation time goes through the roof.
#define fSSAOSamplingRange 80.0 //[10.0 to 50.0] SSAO sampling range. High range values might need more samples so raise both.
#define fSSAODarkeningAmount 1.5 //[0.0 to 5.0] Amount of SSAO corner darkening
#define fSSAOBrighteningAmount 1.0 //[0.0 to 5.0] Amount of SSAO edge brightening
//AMBIENT OCCLUSION - RAYMARCH SSAO
#define iRayAOSamples 24 //[10 to 78] Amount of sample "rays" Higher means more accurate AO but also less performance.
#define fRayAOSamplingRange 0.0005 //[0.0001 to 0.02] Range of AO sampling. Higher values ignore small geometry details and shadow more globally.
#define fRayAOMaxDepth 0.02 //[0.01 to 0.2] Range clip factor to avoid far objects to occlude close objects just because they are besides each other on screen.
#define fRayAOMinDepth 0.0003 //[0.000 to 0.001] Minimum depth difference cutoff to prevent (almost) flat surfaces to occlude themselves.
#define fRayAOPower 2.0 //[0.2 to 5.0] Amount of darkening.
//AMBIENT OCCLUSION - HBAO
#define iHBAOSamples 9 //[7 to 36] Amount of samples. Higher means more accurate AO but also less performance.
#define fHBAOSamplingRange 2.6 //[0.5 to 5.0] Range of HBAO sampling. Higher values ignore small geometry details and shadow more globally.
#define fHBAOAmount 3.0 //[1.0 to 10.0] Amount of HBAO shadowing.
#define fHBAOClamp 0.1 //[0.0 to 1.0] Clamps HBAO power. 0.0 means full power, 1.0 means no HBAO.
#define fHBAOAttenuation 0.02 //[0.001 to 0.2] Affects the HBAO range, prevents shadowing of very far objects which are close in screen space.
//AMBIENT OCCLUSION - SSGI
#define iSSGISamples 24 //[5 to 24] Amount of SSGI sampling iterations, higher means better GI but less performance.
#define fSSGISamplingRange 0.4 //[5.0 to 80.0] Radius of SSGI sampling.
#define fSSGIIlluminationMult 4.5 //[1.0 to 8.0] Multiplier of SSGI illumination (color bouncing/reflection).
#define fSSGIOcclusionMult 0.8 //[1.0 to 10.0] Multiplier of SSGI occlusion.
#define fSSGIModelThickness 50.0 //[0.5 to 100.0] Amount of unit spaces the algorithm assumes the model's thickness. Lower if scene only contains small objects.
#define fSSGISaturation 1.8 //[0.2 to 2.0] Saturation of bounced/reflected colors.
//AMBIENT OCCLUSION - RAYMARCH HBAO
#define iRayHBAO_StepCount 9 //[5 to 32] Amount of steps to march per direction to check for occluders.
#define iRayHBAO_StepDirections 10 //[5 to 25] Amount of rays / directions to march to check for occluders.
#define fRayHBAO_SampleRadius 0.005 //[0.001 to 0.01] Range of AO sampling. Higher values ignore small geometry details and shadow more globally.
#define fRayHBAO_Attenuation 2.0 //[0.4 to 5.0] Sampling attenuation. Used for ignoring objects that are close onscreen but actually far away (i.e. sky and player).
#define fRayHBAO_AngleBiasTan 0.0 //[0.0 to 1.0] Angle bias in tangent space. Used for ignoring occluders that don't have a big angle difference to the source, i.e. flat surfaces that may shadoe themselves.
//AMBIENT OCCLUSION - SCALABLE AMBIENT OBSCURANCE
#define fSAOIntensity 6.0 //[1.0 to 10.0] Linearly multiplies AO intensity.
#define fSAOClamp 2.5 //[1.0 to 10.0] Higher values shift AO more into black. Useful for light gray AO caused by high SAO radius.
#define fSAORadius 2.3 //[1.0 to 10.0] SAO sampling radius. Higher values also lower AO intensity extremely because of Alchemy's extremely retarded falloff formula.
#define fSAOBias 0.2 //[0.001 to 0.05] Minimal surface angle for AO consideration. Useful to prevent self-occlusion of flat surfaces caused by floating point inaccuracies.
#define iSAOSamples 18 //[10 to 96] Amount of SAO Samples. Maximum of 96 is defined by formula.
/*==============================================================================*/
//DEPTH OF FIELD - GLOBAL PARAMETERS
#define DOF_METHOD 4 //[1 to 4] 1: Ring DOF(Petka/martinsh) 2: Magic DOF 3: GP65CJ042 DOF 4: Matso DOF
#define DOF_FOCUSPOINT float2(0.5,0.5) //[0.0 to 1.0] Screen coordinates of focus point. First value is horizontal, second value is vertical position. 0 is left/upper, 1 is right/lower.
#define DOF_NEARBLURCURVE 10.0 //[0.4 to X] Power of blur of closer-than-focus areas.
#define DOF_FARBLURCURVE 0.5 //[0.4 to X] Elementary, my dear Watson: Blur power of areas behind focus plane.
#define DOF_BLURRADIUS 4.0 //[5.0 to 50.0] Blur radius approximately in pixels. Radius, not diameter.
#define DOF_MANUALFOCUS 1 //[0 or 1] Enables manual focus.
#define DOF_MANUALFOCUSDEPTH 0.1 //[0.0 to 1.0] Manual focus depth. 0.0 means camera is focus plane, 1.0 means sky is focus plane.
//DEPTH OF FIELD - RING DOF
#define iRingDOFSamples 6 //[5 to 30] Samples on the first ring. The other rings around have more samples
#define iRingDOFRings 4 //[1 to 8] Ring count
#define fRingDOFThreshold 2.5 //[0.8 to 2.0] Threshold for bokeh brightening. Above this value, everything gets much much brighter. 1.0 is maximum value for LDR games like GTASA, higher values work only on HDR games like Skyrim etc.
#define fRingDOFGain 0.1 //[0.1 to 2.0] Amount of brightening for pixels brighter than threshold.
#define fRingDOFBias 0.0 //[0.1 to 2.0] bokeh bias.
#define fRingDOFFringe 0.5 //[0.0 to 1.0] Amount of chromatic abberation
//DEPTH OF FIELD - MAGIC DOF
#define iMagicDOFBlurQuality 2 //[1 to 30] Blur quality as control value over tap count. Quality 15 produces 721 taps, impossible with other DOF shaders by far, most they can do is about 150.
#define fMagicDOFColorCurve 3.0 //[1.0 to 10.0] DOF weighting curve.
//DEPTH OF FIELD - GP65CJ042 DOF
#define iGPDOFQuality 2 //[0 to 7] 0: only slight gaussian farblur but no bokeh. 1-7 bokeh blur, higher means better quality of blur but less fps.
#define bGPDOFPolygonalBokeh 1 //[0 or 1] Enables polygonal bokeh shape, e.g. POLYGON_NUM 5 means pentagonal bokeh shape. Setting this value to 0 results in circular bokeh shape.
#define iGPDOFPolygonCount 5 //[3 to 9] Controls the amount pf polygons for polygonal bokeh shape. 3 = triangular, 4 = square, 5 = pentagonal etc.
#define fGPDOFBias 0.00 //[0.0 to 20.0] Shifts bokeh weighting to bokeh shape edge. Set to 0 for even bright bokeh shapes, raise it for darker bokeh shapes in center and brighter on edge.
#define fGPDOFBiasCurve 0.0 //[0.0 to 3.0] Power of Bokeh Bias. Raise for more defined bokeh outlining on bokeh shape edge.
#define fGPDOFBrightnessThreshold 1.8 //[0.6 to 2.0] Threshold for bokeh brightening. Above this value, everything gets much much brighter. 1.0 is maximum value for LDR games like GTASA, higher values work only on HDR games like Skyrim etc.
#define fGPDOFBrightnessMultiplier 2.00 //[0.0 to 2.0] Amount of brightening for pixels brighter than fGPDOFBrightnessThreshold.
#define fGPDOFChromaAmount 0.0 //[0.00 to 0.4] Amount of color shifting applied on blurred areas.
//DEPTH OF FIELD - MATSO DOF
#define bMatsoDOFChromaEnable 1 //[0 or 1] Enables Chromatic Abberation.
#define bMatsoDOFBokehEnable 1 //[0 or 1] Enables Bokeh weighting do define bright light spots and increase bokeh shape definiton.
#define fMatsoDOFChromaPow 1.4 //[0.2 to 3.0] Amount of chromatic abberation color shifting.
#define fMatsoDOFBokehCurve 8.0 //[0.5 to 20.0] Bokeh curve.
#define fMatsoDOFBokehLight 0.012 //[0.0 to 2.0] Bokeh brightening factor.
#define iMatsoDOFBokehQuality 2 //[1 to 10] Blur quality as control value over tap count.
#define fMatsoDOFBokehAngle 0 //[0 to 360] Rotation angle of bokeh shape.
/*==============================================================================*\
| EFFECT PARAMETERS - IMAGE ENHANCEMENTS |
\*==============================================================================*/
//SHARPEN
#define fSharpBias 0.35 //[0.05 to 1.0] How big the sharpen offset is (used to compare neighbor pixels to get sharpen amount
#define fSharpStrength 0.7 //[0.05 to 1.0] Amount of sharpening you want.
#define fSharpClamp 1.8 //[0.2 to 2.0] Clamps the sharpening to a maximum amount to prevent aliasing
//FISHEYE, CHROMATIC ABBERATION
#define fFisheyeZoom 0.5 //[0.5 to 1.0] some lens zoom to hide bugged edges due to texcoord modification
#define fFisheyeDistortion 0.15 //[-0.3 to 0.3] distortion of image, fish eye effect
#define fFisheyeDistortionCubic 0.15 //[-0.3 to 0.3] distortion of image, fish eye effect, cube based
#define fFisheyeColorshift -0.03 //[-0.1 to 0.1] Amount of color shifting
//IMAGE GRAIN
#define fGrainSaturation 1.0 //[0.0 to 2.0] Saturation of Grain. Higher means more colored noise, 0.0 means blacknwhite no TV signal noise.
#define fGrainIntensityBright 0.0 //[0.0 to 2.0] Intensity of Grain in bright areas.
#define fGrainIntensityMid 0.0 //[0.0 to 2.0] Intensity of Grain in midtone areas.
#define fGrainIntensityDark 0.1 //[0.0 to 2.0] Intensity of Grain in dark areas.
//EXPLOSION
#define fExplosionRadius 10.5 //[0.2 to 100.0] Amount of effect you want.
//SMAA
#define fSMAAThreshold 0.05 //[0.05 to 0.20] Edge detection Threshold. If SMAA misses some edges try lowering this slightly. I prefer between 0.08 and 0.12.
#define iSMAAMaxSearchSteps 64 //[0 to 98] Determines the radius SMAA will search for aliased edges
#define iSMAAMaxSearchStepsDiag 32 //[0 to 32] Determines the radius SMAA will search for diagonal aliased edges
#define iSMAACornerRounding 100 //[0 to 100] Determines the percent of antialiasing to apply to corners. 0 seems to affect fine text the least so it's the default.
#define iSMAAEdgeDetectionMode 2 //[1 to 3] 1: Luma edge detection 2: Color edge detection 3: Depth edge detection
#define bSMAAPredication 0 //[0 or 1] Enables predication which uses BOTH the color and the depth texture for edge detection to more accurately detect edges.
#define fSMAAPredicationThreshold 0.01 //[0.001 to 0.2] Threshold to be used in the depth buffer.
#define fSMAAPredicationScale 2.0 //[0.5 to 4.0] How much to scale the global Threshold used for luma or color edge detection when using predication
#define fSMAAPredicationStrength 0.4 //[0.1 to 1.0] How much to locally decrease the Threshold.
#define iSMAADebugOutput 0 //[0 to 4] 0: Normal | 1: edgesTex | 2: blendTex | 3: areaTex | 4: searchTex - Only for troubleshooting. Users don't need to mess with this.
//HEAT HAZE
#define fHeatHazeSpeed 2.0 //[0.5 to 10.0] Speed of heathaze waves
#define fHeatHazeOffset 5.0 //[0.5 to 20.0] Amount of image distortion caused by heathaze effect
#define fHeatHazeTextureScale 1.0 //[0.5 to 5.0] Scale of source texture, affecting the tile size. Use Heathaze debug effect for better visible effect.
#define fHeatHazeChromaAmount 0.6 //[0.0 to 2.0] Amount of color shift caused by heat haze. Linearly scales with fHeatHazeOffset.
#define bHeatHazeDebug 0 //[0 or 1] Enables raw texture output for debugging purposes. Useful for texture experiments.
//LED SHADER
#define fLEDCircleSize 25.0 //[10.0 to 50.0] Size of the single LED's
#define fLEDBackgroundColor float3(0.2,0.2,0.2) //[0.0 to 1.0] R G and B components of background color between LED's.
/*==============================================================================*\
| EFFECT PARAMETERS - OVERLAYS |
\*==============================================================================*/
//HD6VIGNETTE
#define fHD6VignetteMode 1 //[1 to 3] Vignette Alignment 1: Left and right | 2: top and bottom | 3: corners.
#define fHD6VignetteTop 0.7 //[0.3 to 1.5] Top/left (depending on mode) height of bar.
#define fHD6VignetteBottom 0.7 //[0.3 to 1.5] Bottom/right (depending on mode) height of bar.
#define fHD6VignetteRoundness 0.0 //[0.0 to 100000.0] Amount of circularism (new word invented hoho), 0 means linear vignette, 100000.0 means rougly total circle.
#define fHD6VignetteColorDistort 0.0 //[0.0 to 5.0] Distorts the colors.
#define fHD6VignetteContrast 11.6 //[0.0 to 20.0] Contrast of vignette curve.
#define fHD6VignetteBorder 6.5 //[0.0 to 5.0] Vignette Border factor.
//STANDARDVIGNETTE
#define fVignetteAmount 2.9 //[0.0 to 5.0] Amount of vignette color change.
#define fVignetteCurve 1.5 //[0.0 to 5.0] Curve of vignette color change.
#define fVignetteRadius 0.95 //[0.0 to 5.0] Radius from center where vignette color change kicks in.
#define fVignetteColor float3(0.0, 0.0, 0.0) //[0.0 to 1.0] RGB vignette color.
//BORDER
#define fBorderWidth float2(10,10) //[0 to 2048, 0 to 2048] (X,Y)-width of the border. Measured in pixels. If this is set to 0,0 then the border_ratio will be used instead
#define fBorderRatio float(1920.0 / 1080.0) //[0.1 to 10.0] Set the desired ratio for the visible area. You MUST use floating point - Integers do not work right.
#define fBorderColor float3(1.0, 0.0, 0.0) //[0.0 to 1.0] What color the border should be. In RGB colors, 0,0,0 is black, 1,1,1 is pure white.
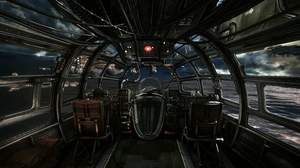
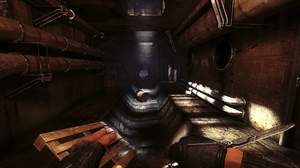
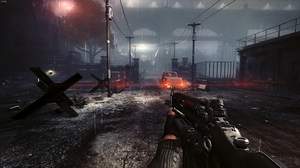
Video comparison vs vanilla game in Old Blood:
https://youtu.be/qGfKWCWJeWI
Preset during using Reshade 3.0 returns errors in syntax.
Helps only installing ReShade 1.1.0 with SweetFX 2.0.7
https://yadi.sk/d/Monr93DQ3QEzXe
It automatically detects OpenGL, and places library in correct, automatic way, so will just only put preset, and everything works.
Those issues you are having are not caused by my preset. I assume its some conflict between the OpenGL renderer and the API for Reshade possibly.
Hello! Preset cool! But somehow buggy dynamic shadows on characters and other Offer. I applied even in Rage, but there are shadows disappear completely. Well, I understand this is due to opengl32.dll.
Hey I message you on YouTube with the details on how to get it to work. You dont need the exact same versions of Reshade but it helps to avoid conflicts between different settings files and different dll's with certain presets.
Silly question probably, but do I need to download and use the same versions of reshade and master effect to make this preset work. You have me wanting to play this again. Color looks amazing and sharp!
May I have a step by step guide to install this preset?
Thanks!
It's probably possible, however different versions of Reshade may not be compatible with older presets especially MasterEffect ones, but I only use my own so I havent tested older ones. Give it a try but make sure to backup your Reshade and MasterEffect files so you dont mess stuff up too much.
Determining the version of DirectX a game uses is really trial and error, Google will tell you if your specific. You really need to know if its 32/64bit as that will determine what Reshade32/64.dll to use. Then you would name the dll to either d3d9, d3d10,d3d11, or opengl32 etc. Most DirectX8 games from like 2004 work under the DX9 (d3d9.dll) wrapper, d3d11.dll or DX11 is normally dxgi.dll, renaming the right Reshade.dll is more tricky.
A TXT file will be created if the API is successfully initialized and hooks are created in the application. Look inside the game directory for this file, if you dont see it after launching the game then either you have the wrong bit version 32/64 or renamed it wrong, for example a DX9 game using the d3d11 or openGL dll.
Thanks, yeah I have been meaning to do a preset for this game for a while, it turned out decent in the end. The FIFA update is delayed as I cant get the DOF effect right just yet but I will get it over the weekend when I have more time to test stuff :)
Hi bopper how you doing mate? Just a couple of questions. Can I use Reshade 2.0 with Reshade 1.5 presets? and how do I know what version of direct x does a game use and how do I know if its 32 or 64 bit? ive got some games I bought from steam but couldn't find any info on google.
Definatley loving this preset man it looks glorious and you've captured the mood perfect
Not sure what Dirty is, if you mean Grain or Screen Dirt or one of those effects then No none of them are used. I just changed around the colours and gamma to remove some of the purple filtered tint from the game. If you look at the settings text you can see the particular enabled effects :)
real cool.
but you have use dirty in mastereffect ?
Hopefully it will work nicely with Old Blood too, I obviously cant test that game but it shouldnt be to far off. Feel free to tweak it for that game yourself if you want and upload your own preset for Old Blood. Im still learning how to do all this but I appreciate the positive feedback :). The real geniuses are the dudes who make these tools available to us :)
Can't wait to try this one out! Thank you so much for producing high quality presets for us PC gamers! Cheers!